The following guide shows the steps to implement a CuteEditor for .NET Control into
ASP.NET applications. If you haven't downloaded the software, please download it
from here.
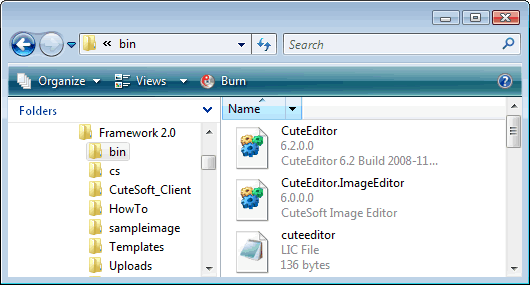
1. Install CuteEditor assembly and license file

Copy the following files to your application bin folder.
- CuteEditor.dll
- CuteEditor.ImageEditor.dll
- NetSpell.SpellChecker.dll
- CuteEditor.lic
2. Copy CuteEditor Client files
The "CuteSoft_Client" folder and all file it contains should be deployed to http://{your
site}/{your application}/ on your web site.
If you want to deploy CuteEditor Client file to a different location, please check
the developer's guide.
3. Add Uploader httpModule to web.config's httpModules list
To allow CuteEditor to upload big files, you need to add Uploader HttpModule to
your application.
IIS 5.0, 6.0 and IIS 7.0 Classic mode
<configuration>

                              <system.web>

                                <httpModules>

                                  <add name="CuteEditor.UploadModule" type="CuteEditor.UploadModule,CuteEditor"/>

                                 </httpModules>

                              </system.web>

                            </configuration>
IIS 7.0 Integrated mode
<configuration>

                              <system.webServer>

                                <modules>

                                  <add name="CuteEditor.UploadModule" type="CuteEditor.UploadModule,CuteEditor"/>

                                </modules>

                              </system.webServer>

                            </configuration>
4. Add CuteEditor to an ASP.NET page